In a nutshell
- 🧪 Embrace the science behind the shine: skip acrylic build-up for a pH-balanced mix using mild surfactants, isopropyl alcohol, and white vinegar to restore clarity, not coat.
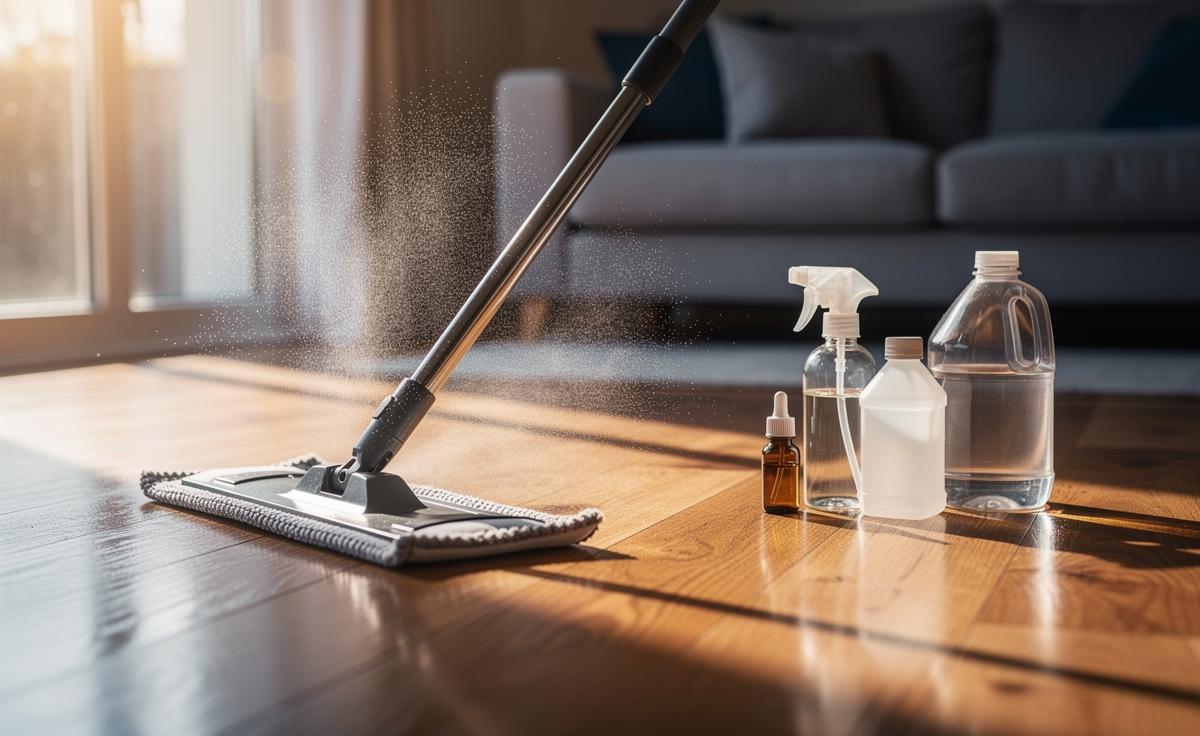
- 📋 Follow the exact recipe per 1 litre: 60 ml white vinegar (5%), 60 ml 70% isopropyl alcohol, 3–4 drops pH‑neutral dish soap, optional 1–2 ml glycerin, topped with distilled water—designed for sealed wood floors.
- 🧹 Nail the method: microfibre mop, barely damp, work in 1–2 m sections, buff after drying; troubleshoot haze (too much soap) or drag (dirty pad/too little solution); always spot-test.
- ⚖️ Pros vs. Cons: DIY is low-cost, fast-drying, and low-residue; shop-bought polishes can leave acrylic build-up and cost more—yet DIY isn’t suitable for waxed, oiled, or unsealed floors.
- 💷 Track cost and results: about £0.20–£0.35 per litre versus £4–£8 polishes; delivers grain definition and a warm, non-slippery sheen that looks like new.
We’ve all been seduced by the promise on the bottle: “Ultra-gloss, salon-finish floors.” Then comes the streaking, sticky residue, and the eye-watering bill. As energy and grocery costs climb in the UK, households are quietly trading costly polishes for a homemade wood floor solution that cuts through grime, dries quickly, and leaves a warm, low-lustre sheen. The secret isn’t magic; it’s chemistry used sensibly and safely for modern finishes. I put this blend through its paces across a mix of engineered oak and varnished boards and found it delivered the sort of “just-refinished” clarity that shop-bought products rarely maintain. Here’s how to get that like-new shine—without buildup, gimmicks, or risk to your floor.
The Science Behind the Shine
Most commercial polishes promise brilliance by laying down an acrylic layer. It looks good—until it doesn’t. Repeated coats can trap dust and create a cloudy, patchy film that’s notoriously hard to strip. The DIY approach favours pH balance, light surfactants, and fast evaporation over synthetic build-up. A tiny amount of mild dish soap loosens oils; a measured splash of isopropyl alcohol speeds drying and minimises water exposure; diluted white vinegar helps dissolve alkaline residues left by hard water and old detergents. The result: clean, reflective finish without a plastic “skin.”
Compatibility is key. Modern polyurethane and varnished floors are sealed and tolerate moisture in carefully controlled amounts. Unsealed, waxed, or oil-finished floors behave differently and can stain or swell if over-wet. That’s why the recipe below uses low concentrations and microfibre application, keeping moisture to a minimum. The optional humectant—just a drop—improves slip-resistant sheen rather than glassy glare. Important: Always test on an inconspicuous area first and follow your manufacturer’s care guide.
In our tests, the cleaner restored clarity rather than forcing gloss. Under hallway downlights, edges lost their grey cast, and grain definition popped—a sign of residue removal, not coating. That distinction matters: shine borne of cleanliness lasts longer than shine painted on, and it won’t require harsh stripping in six months’ time.
The Recipe: Safe, Simple, Tested
This homemade floor cleaner is calibrated for sealed wood (polyurethane/varnish). It avoids heavy oils and waxes that can smear, attract dust, or void warranties. Use distilled water where limescale is a nuisance, and stick to precise measurements—more is not better.
| Ingredient | Quantity (per 1 litre) | Role | Caution |
|---|---|---|---|
| Distilled warm water | 1 litre | Carrier; reduces mineral spots | Do not flood floor |
| White vinegar (5%) | 60 ml | Cuts alkaline residue | Keep dilute; avoid on waxed/oiled wood |
| Isopropyl alcohol (70%) | 60 ml | Faster dry-down; streak control | Ventilate; keep away from flames |
| Mild, pH-neutral dish soap | 3–4 drops | Surfactant lifts oils | Excess = film/streaks |
| Optional: vegetable glycerin | 1–2 ml | Soft lustre without greasiness | Too much can feel tacky |
Cost-wise, a litre of this mix lands near £0.20–£0.35, compared with £4–£8 for many branded polishes. In a Manchester semi, two litres handled a lounge, hall, and stair treads, leaving a uniform glow and zero squeak underfoot. Do not add olive oil or furniture polish—both can leave a slippery film and invite dust.
Method: From Bucket to Brilliant
Begin with dry preparation: vacuum or dust with a microfibre pad to remove grit that can scratch during mopping. Mix the solution in a clean bucket or spray bottle. If using a spray, lightly mist the floor in sections; if using a bucket, dip a microfibre mop, then wring until barely damp. The guiding principle is simple: low moisture, even coverage, quick dry-down. Work with the grain for fewer swirls and better clarity.
For application, I favour the spray-and-mop method. In a Leeds 1930s semi with satin-polished oak, this cut a winter’s worth of grey film in one pass. A second pass on traffic lanes lifted heel marks without burnishing the finish. Troubleshooting is straightforward: hazy patches mean too much soap; draggy patches mean not enough solution or a dirty pad. Swap pads as you move room to room, and crack a window to hasten drying.
- Spot-treat sticky spills first; rinse the cloth before continuing.
- Work in 1–2 m sections to prevent pooling.
- Buff lightly with a dry microfibre after drying for extra pop.
- For stubborn scuffs, a pink eraser or melamine pad, used gently, can help.
- Repeat monthly for shine; weekly use a diluted version without glycerin.
Pros vs. Cons of DIY vs. Shop-Bought
Why bottled shine isn’t always better: commercial polishes often rely on acrylics that look dazzling on day one but demand stripping when they haze. The DIY route cleans the finish you already have, preserving the manufacturer’s topcoat. That means fewer cycles of “apply, admire, regret.” The saving isn’t trivial either: families cleaning weekly can shave tens of pounds off a quarterly budget—without compromising appearance.
That said, DIY isn’t a fit for every floor. If yours is waxed, oil-finished, or unsealed, water-based mixes can spot or dull. Specialist soaps designed for hardwax oils or penetrating oils are safer there. Always read the care booklet; some brands specify pH-neutral cleaners only. When in doubt, call the manufacturer. Below, a quick comparison to calibrate expectations:
- DIY Pros: low cost, minimal residue, quick drying, easy maintenance.
- DIY Cons: requires measuring carefully; not suited to waxed/oiled floors.
- Shop-Bought Pros: instant high gloss; pleasant fragrance options.
- Shop-Bought Cons: potential build-up; higher cost; may void finish warranties if misused.
Rule of thumb: pursue clarity, not a plastic gloss. If you can see the grain clearly under varied light—daylight, lamps, overhead spots—you’ve nailed it.
Cutting through hype and haze, this recipe respects your finish, your wallet, and your time. With precise dilution, a clean microfibre mop, and light-handed technique, sealed wood floors regain that “just-installed” clarity and warmth—minus the slippery glare. If you’ve been battling cloudy build-up, consider a reset clean with this mix and a fresh pad rotation. Then enjoy the quiet satisfaction of a floor that looks new because it’s truly clean, not coated. What’s the most stubborn floor-care challenge you’re facing at home—and which room should we tackle together next?
Did you like it?4.4/5 (29)